CHAPTER ELEVEN
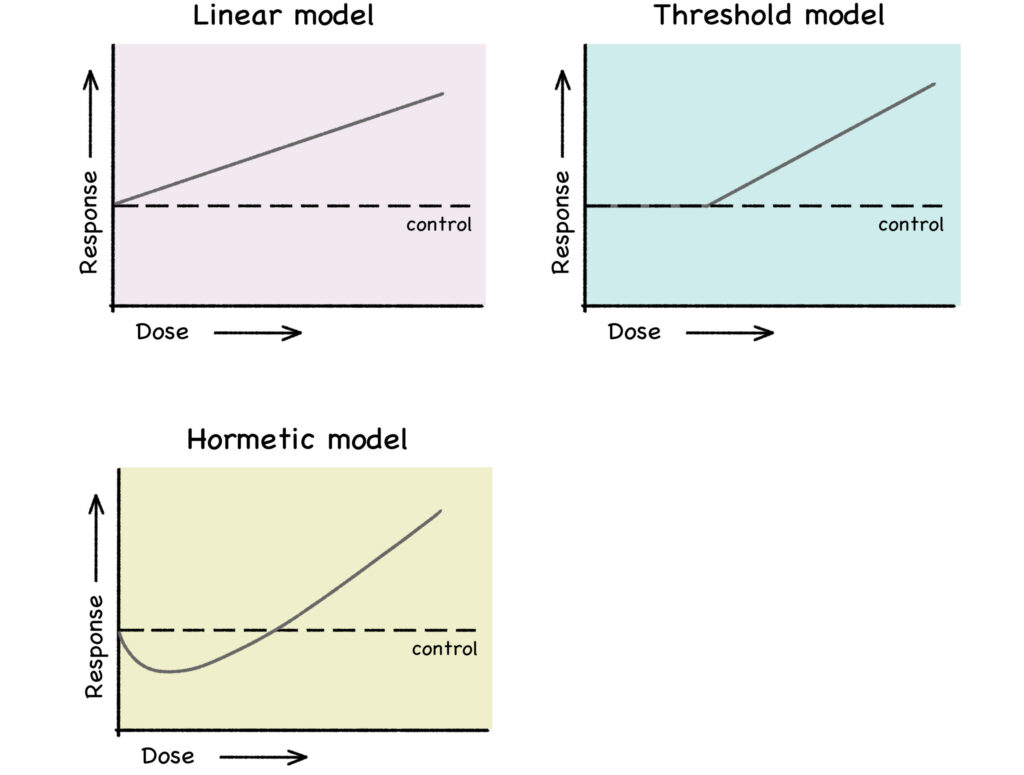
Source: https://www.the-scientist.com/vision/challenging-dose-response-dogma-49062
Credit: By the authors
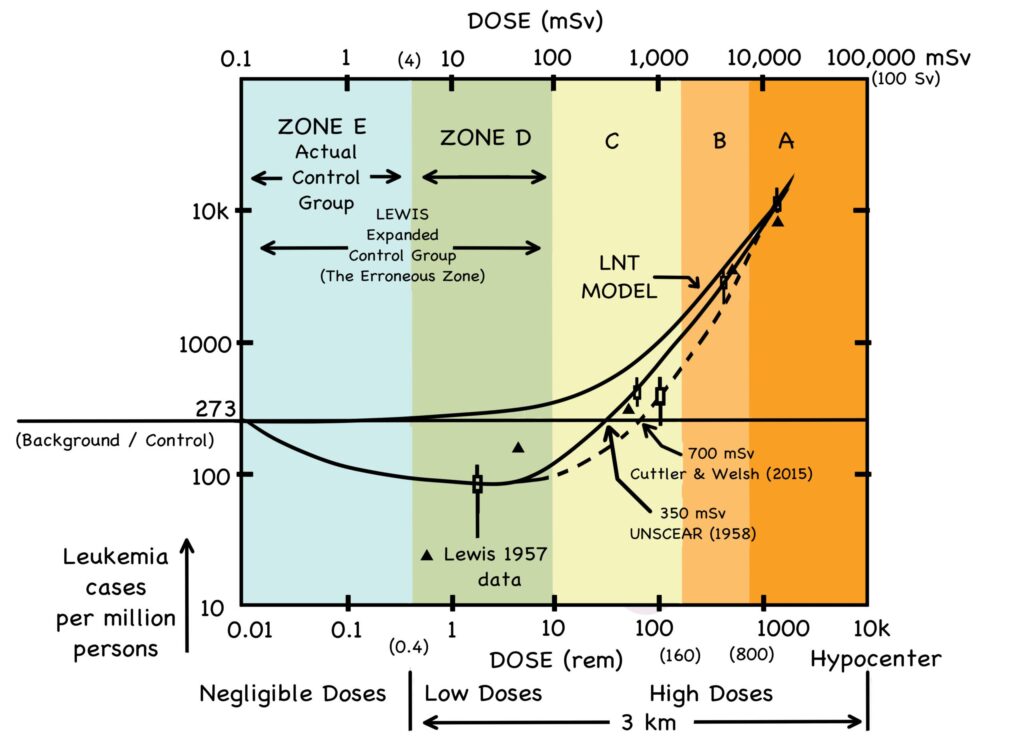
Source: https://www.researchgate.net/publication/288992343_Leukemia_and_Ionizing_Radiation_Revisited
Source: https://www.sciencedirect.com/science/article/abs/pii/S0013935121003194
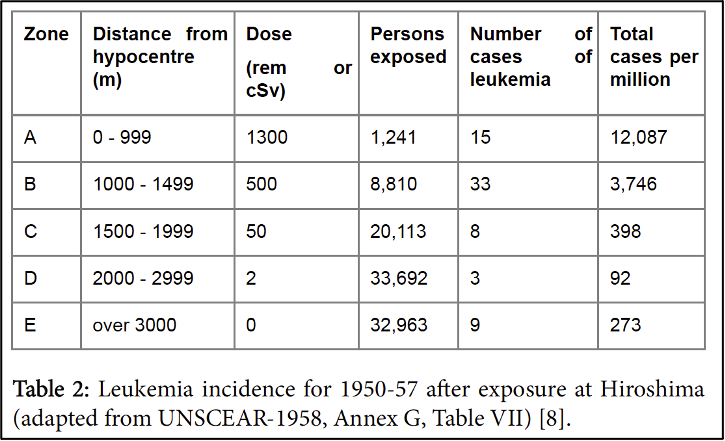
Source: https://www.researchgate.net/publication/288992343_Leukemia_and_Ionizing_Radiation_Revisited
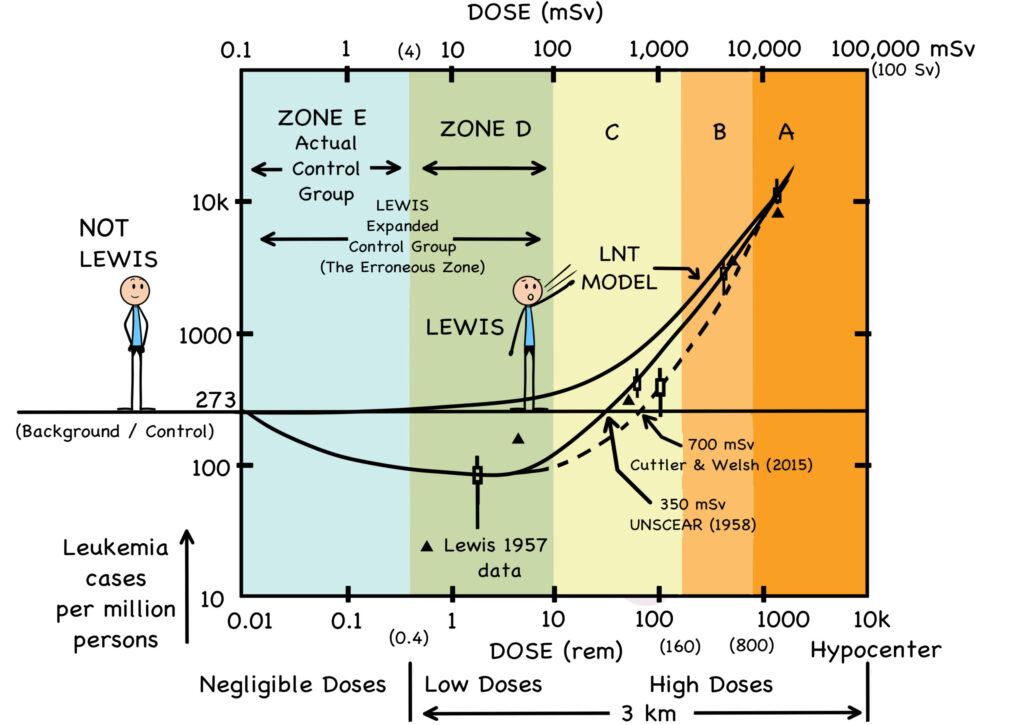
Credit: By the authors, with apologies to Cuttler, Welsh, and Calabrese